
ESP32 & ESP8266Code de714747b2
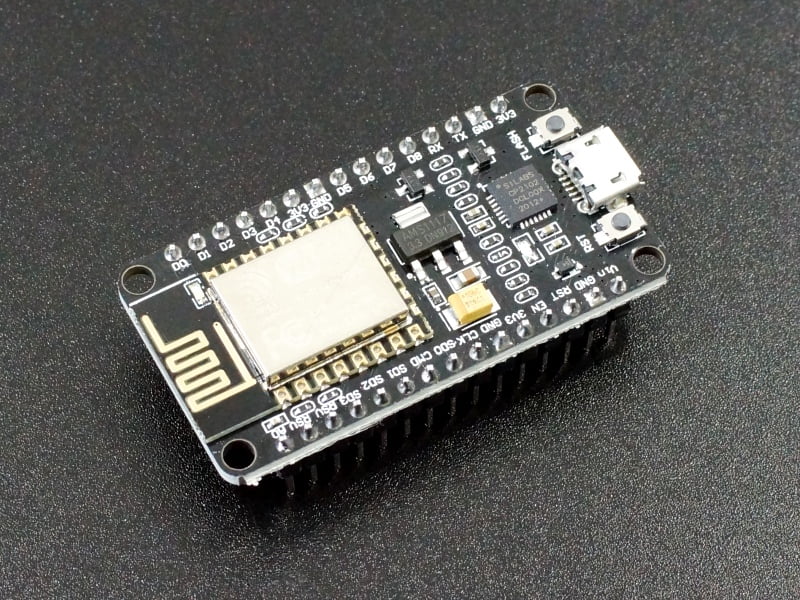
ESP8266 NodeMCU V1.0 ESP-12E WiFI Module
• Microcontroller: ESP-8266 32-bit • Clock Speed: 80 MHz • USB Converter: CP2102 • USB Connector: Micro USB • Operating Voltage: 3.3V • Flash Memory: 4 MB •…
- Delivery in 2 to 4 working daysFree in Islamabad & Rawalpindi above Rs 5,000
- Cash on deliveryPay when your parcel arrives
- 7-day checking warrantyDead-on-arrival items replaced
- Packed with careAnti-static & padded packaging
Highlights
- ESP8266 NodeMCU V1.0 ESP-12E WiFi Module
- Under Boards Manager, install ESP8266 by ESP8266 Community .
- Under Tools/Boards select “ NodeMCU 1.0(ESP-12E Module) “.
- Set Upload Speed to “ 115200 “.
- Select the port that the board is attached to. In my case it happened to be COM19
- In the Serial Monitor window, set comm rate to 115200 and line ending to Both NL & CR
Specifications
- Microcontroller
- ESP-8266 32-bit
- Clock Speed
- 80 MHz
- USB Converter
- CP2102
- USB Connector
- Micro USB
- Operating Voltage
- 3.3V
- Flash Memory
- 4 MB
- Digital I/O
- 11
- Analog Inputs
- 1
- Communications
- Serial, SPI. I2C and 1-Wire via software libraries
- WiFi
- Built-in 802.11 b/g/n
About this product
DESCRIPTION
The ESP8266 NodeMCU V1.0 ESP-12E WiFi module is the latest version of this popular module and can be used as a WiFi enabled replacement for an Arduino in many applications.
KEY FEATURES OF ESP8266 NODEMCU V1.0 ESP-12E MODULE:
Besides adding WiFi capability, the main claim to fame for the ESP8266 processor over the AVR processor of the standard Arduino is that it has a larger 4 MB of Flash memory and runs at clock speeds of 80 MHz and can sometimes optionally be overclocked to 160 MHz and therefore has a very fast processing speed.
The Digital I/O all support PWM and interrupts. In addition they can be configured to have pull-up or pull-down resistors. Though there are 11 digital I/O pins, 2 are typically reserved for use as the TX/RX lines if serial communications are used which leaves 9 digital I/O.
On the down-side, it has only 1 analog input which is probably the most significant limitation for some sensor type applications. That can always be overcome by using an external Analog Mux module like our 16-channel 74HC4067 or our ADS1115 4-channel 16-bit ADC module below if more analog I/O is desired.
The module can be powered via the USB port or by using an external 7-12V power supply connected to the VIN pin. The module runs at 3.3V, so keep that in mind when working with I/O. The digital I/O is stated as being 5V tolerant, but the analog input needs to be limited to < 3.3V.
The blue on-board LED is connected to D0 (GPIO16) and can be accessed using the LED_BUILTIN constant.
The module has a typical ‘Reset’ button as well as a ‘Flash’ button. The Flash button is used when programming using the original NodeMCU firmware. If the module is being used with the Arduino IDE, the Flash button does not…
Related searches
You may also need
More Dev Boards →

-20%


-13%
Arduino
Arduino UNO WiFi R3 ATmega328P + ESP8266 8Mb USB-TTL CH340G Development BoardRs 1,650Rs 1,900-13%

ESP32 & ESP8266
Compatible Wroom ESP32 WiFi Based Microcontroller Development Board Nodemcu CH9102XRs 1,075

ESP32 & ESP8266
D1 Mini Nodemcu ESP32 ESP-wroom-32 Wlan WiFi Bluetooth IOT Development Board 9102x )Rs 1,570

-47%

-8%
